How to make your own polyboards with Kingspan foil coated insulation boards
If you’re a photo studio owner, you will no doubt be familiar with polyboards. These large, lightweight sheets are the unsung heroes of lighting control- used for adding light, increasing shadows, and as makeshift backdrops and gobos. If you’re in the UK there are basically two options- polystyrene sheets or Kingspan foil coated insulation boards. The latter is the better option, but painting it isn’t quite as straighforward as painting polystyrene sheets… In this article we’ll walk you through what you need, where to get it from and how to do it.
Kingspan vs. Polystyrene: Which is Best for Your Studio?
When it comes to DIY polyboards, the two most common materials you’ll find in the UK are standard polystyrene sheets and Kingspan foil-coated insulation boards. While polystyrene may seem like the more obvious and budget-friendly choice, my experience has taught me that it’s a false economy. The Kingspan boards we used were £37 each and the polystyrene boards were £20.
In our studio, we started with polystyrene boards. They were easy to get hold of and lightweight, which was great. However, it wasn’t long before we ran into problems. Here’s a quick breakdown of why we switched to Kingspan boards:
-
Durability and Warping: After painting, our polystyrene boards began to warp. The change in temperature and constant movement in the studio caused them to bend and lose their flat surface, which is crucial for even light reflection. Kingspan, with its rigid foam core and foil coating, is far more structurally stable and resistant to warping. That said, the warping could’ve been our fault for not letting them dry laid flat!
-
Mess and Maintenance: Polystyrene is notorious for shedding tiny white foam beads, especially when it gets knocked around—and in a busy studio, things get knocked around a lot! This was a constant mess to clean up. While it’s still a little fragile, Kingspan’s construction means you don’t have to worry about it crumbling and leaving bits everywhere.
-
A Professional Finish: The foil-coated surface of Kingspan provides a solid, flat foundation for painting. Once primed correctly, it holds the paint beautifully, giving you a smooth, professional-looking finish that a textured polystyrene board can’t match.
Ultimately, while Kingspan boards are a bit more of an initial investment and require a specific priming process, they are the clear winner for anyone who wants to build durable, long-lasting polyboards that will stand up to the demands of a working studio.
While it's still a little fragile, Kingspan's construction means you don't have to worry about it crumbling and leaving bits everywhere.

Polystyrene boards (warped)

Kingspan polyboards (not warped!)
What you’ll need to paint Kingspan insulation board
When I was shopping around for boards, a few websites mentioned that one of the advantages of Kingspan board is that you can paint it. But there was very little information available as to how I should go about that! Obviously, painting right on to the foil coating wasn’t going to work. So after a bit of research I settled on the below shopping list:
Zinsser Bulls Eye 123 Primer Sealer – get it here
Vinyl Matt Black Emultion – get it here
Trade Matt White Emulsion – get it here
80 Grit sandpaper
Rollers & Paint tray(I just got the cheapest Wickes had as wasn’t going to be needing them again.
Plastic floor covers


Step 1: Prep the board
To prep Kingpan insulation board for painting, lay your plastic sheets down on the floor and carefully lay the board down over it. Remember, the board is quite fragile so if you do something daft like stand on it with your size 11’s you’ll damage it (as we found out). As the surface is completely flat, we need to give the primer something to hold onto, so take your 80 grit sandpaper and lightly buzz over the entire surface. You’ll see some little scuffs as you go and these will be what the primer grips on to before drying. Careful not to go too hard or use sandpaper that’s more coarse as the foil coating is very thin and you could quite easily go throught it. Once you’ve sanded the surface, go over it with a damp cloth to remove any residue.

Step 2: Apply a thin coat of primer
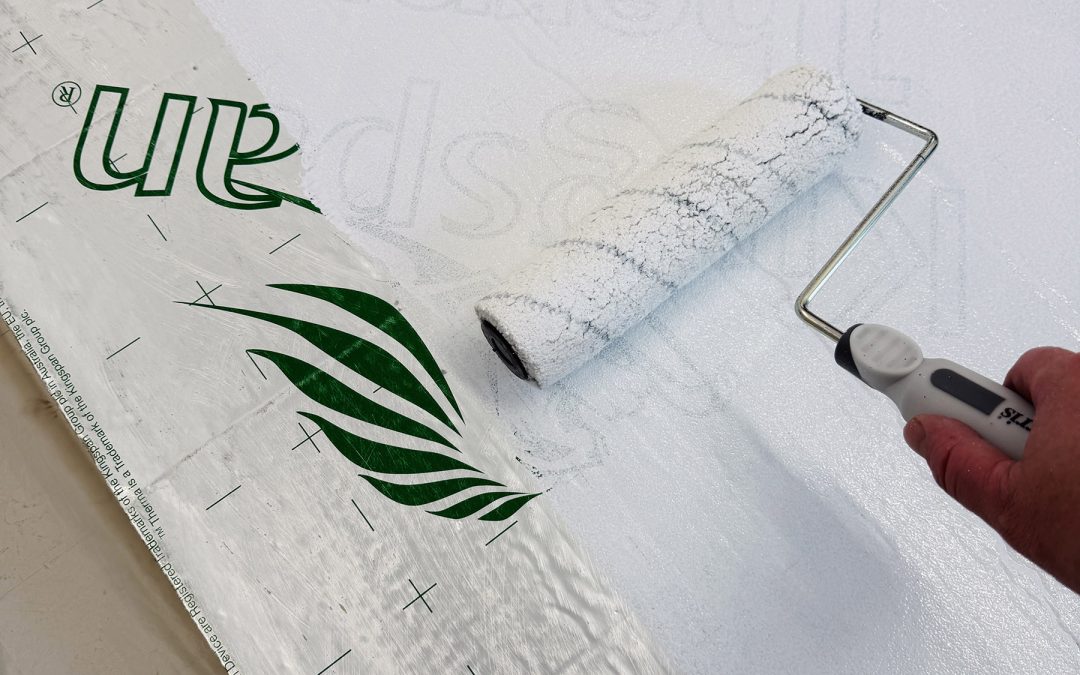
Now the board is ready to be painted, we need to apply a thin coat of the primer. We used the Zinsser Bulls Eye 123 primer from Wickes and it went on and dried just fine. We just used one thin coat and this was enough. The coat was thin enough to still see the logos on the board, but make sure you cover the whole surface. Once this is done, leave it to dry.

Step 3: Apply your first coat of paint
Once the primer is dry (the one we used dried really quickly) it’s time to apply the first coat of paint. We’re not making works of art here, so you can just slap it on if you aren’t too worried about a nice finish. The above photograph was taken just after the first coat- we applied it quite thick, but you could still see the Kingspan logos a little as you can see.

Step 4: Apply the final coat and leave to dry
Once your first coat is dry, you can go ahead and apply a second coat. Two coats was enough to completely cover the boards in our case, but if you’ve applied thinner coats a third might be needed. As we suspected the warping we’d seen with our polystyrene boards was because they’d not completely dried before being put into their stands, we let these ones dry completely while laying flat. It was a scorcher here in Northamptonshire the day that we did this, so we just laid them out in the sun for a bit! And you’re done!
What’s the best type of polyboard holder for a photo studio?
Now that you’ve got your new polyboards all painted up, you’ll something that holds them upright. You’ve basically got two choices here- a fixed, floorstanding polyboard holder like this one from Doughty, or a wheeled version like this one from Essential Photo. The fixed ones are slightly cheaper at £45 each but the wheeled ones, priced at £80 each are a lot more convenient, especially if your studio space is tight and you’ll be moving the boards around a lot. We have the wheeled version in our studio.

And there you have it—your very own set of polyboards! While the process of painting Kingspan requires a few extra steps compared to standard polystyrene, the payoff is worth it. You now have a durable, long-lasting studio tool that won’t warp or shed bits everywhere. By investing a little time and effort in this DIY project, you’ve equipped your studio with a key piece of lighting equipment that will serve you for years to come. Now get back to shooting and create some amazing light!
Our Studio
From our base in Northamptonshire, we’ve built a portfolio of clients that spans industries and reaches across the globe. We’ve been in operation since 2016 consistently delivering high-quality photography that meet the exacting standards of some of the world’s most recognisable brands.
Recent Comments